Power BI Custom Connectors can significantly boost your data analysis in Microsoft’s Power BI, a top tool for turning complex data into clear insights. Although Power BI is already powerful with its user-friendly design and extensive reporting tools, using custom connectors lets you do even more. These connectors help you access a wide range of data sources and APIs, enhancing Power BI’s capabilities. This guide will show you how to use a custom connector to tap into the Power BI API, broadening your data analysis options.
Introduction to Custom Connectors in Power BI

Custom connectors in Power BI are a game-changer.
They allow users to connect to data sources that aren’t supported natively by Power BI, providing the flexibility to tailor data retrieval to specific needs.
A prime example is the Power BI REST API custom connector. It lets users fetch data directly from the Power BI API, offering advanced data manipulation and integration capabilities.
Getting Started with the Power BI REST API Custom Connector
The journey begins with the Power BI REST API custom connector, freely available for download. Interested users can find it on GitHub at Power BI REST API custom connector. Cheers to migueesc123 for developing something so useful!
Before diving in, ensure that you have Power BI Desktop installed on your computer, as this is a prerequisite for using the custom connector.
Activating the Power BI Custom Connector
Installing and activating the custom connector is straightforward:
- Download the connector from the provided GitHub link.
- Extract the
.mezfile and place it into theCustom Connectorsdirectory, typically located atC:\Users\[YourUsername]\Documents\Power BI Desktop\Custom Connectors. - Open Power BI Desktop. If it’s your first time using a custom connector, you may encounter a security warning. Navigate to
Options and settings > Options > Global > Security, and select the option to allow any extension to load without validation or warning. Restart Power BI Desktop to apply these changes.
Retrieving Data with the Power BI Custom Connector
Once the connector is activated, retrieving data is just a few clicks away:
- Go to the “Get data” menu within Power BI Desktop.
- Select “More” to find the Power Platform section, then choose the Power BI API connector and click “Connect”.
- The connector will prompt you to log in with an admin account, connecting you to your tenant’s Power BI API.
Best Practices for Securely Using Power BI Custom Connectors

While custom connectors offer powerful capabilities, it’s essential to use them responsibly. Always verify the source of any custom connectors to avoid security risks.
Additionally, consider the implications of allowing extensions to load without validation and follow best practices for data governance and security within your organization.
How to Use the Power BI Custom Connector to Create a Report Usage Report For an Entire Workspace?
Each dataset and report in Power BI includes a “View usage metrics report” button. Clicking this opens a report that displays top users, most visited pages, user mediums, and popular date ranges. These new usage metrics also show trends and click-through rates.
While the native metrics are robust, they only apply to individual reports. However, you can consolidate metrics for all reports across your organization using Power BI’s custom REST API Connector. This provides valuable insights and makes it easier to present data to leadership.
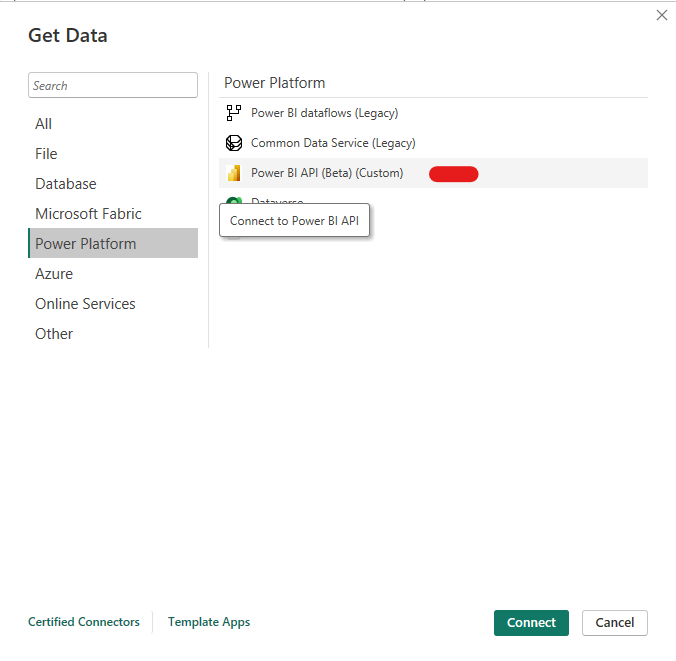
First, just click “Get data” and use the Power BI API custom connector under the Power Platform sub-menu.
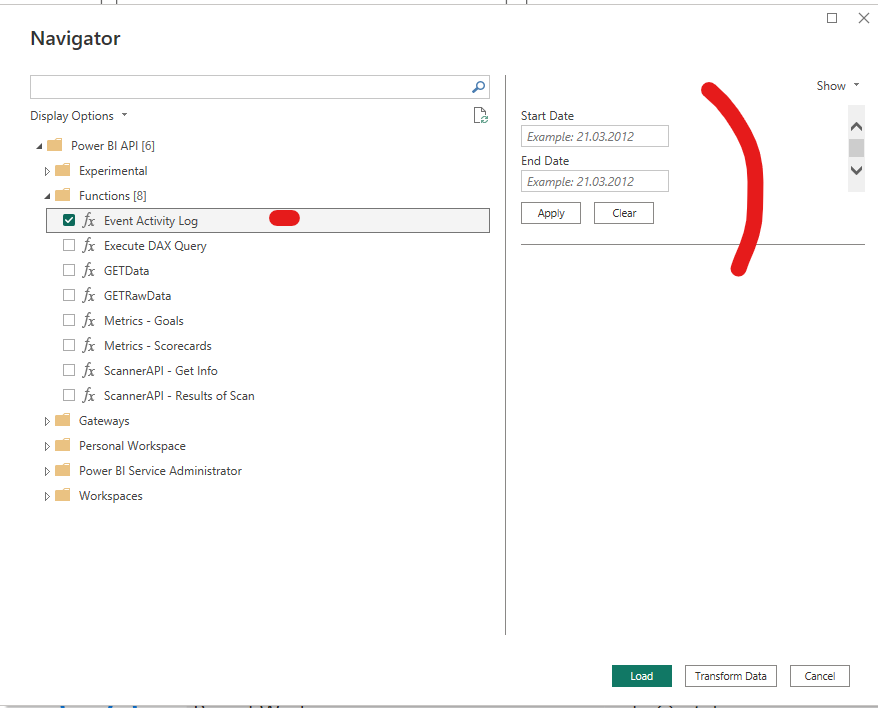
If we are strictly interested in “Usage metrics” for our reports in our workspaces, we need to use the Event Activity Log function under Functions.
You can only go back as far as 30 days. If you need more of an extensive history – you need to create an ETL process saving the data to a database for example. Using SSIS is an option.
After filling in the dates it’s a simple matter of using Power BI built-in Power Query to transform the data.